Showing posts with label diy. Show all posts

Sunday, January 26, 2014

DIY Hall Tree from Old Door

We don't really have an entry way to our house, and it's kinda annoying.  Everyday when I leave for work, I have my fancy Coach purse, my lunch box, and a tote back with my gym clothes.  That's a lot for one person, not to mention a mom.  Add to that a diaper bag, a nap mat, milk, diapers, wipes.  Sheesh.  That's a lot of stuff.  When we come home every day, my purse goes on one of our extra dining room chairs (I have a strict rule that Coach NEVER goes on the floor-I work hard to spoil myself!) and the rest gets thrown on the floor.  It makes the room looked so cluttered and I never really know where anything is.  So I talked Justin into making me a hall tree. 


We repurposed a closet door that I bought from Restore for $10.  I have seen these pop up all over Pinterest and I fell in love with the idea. 
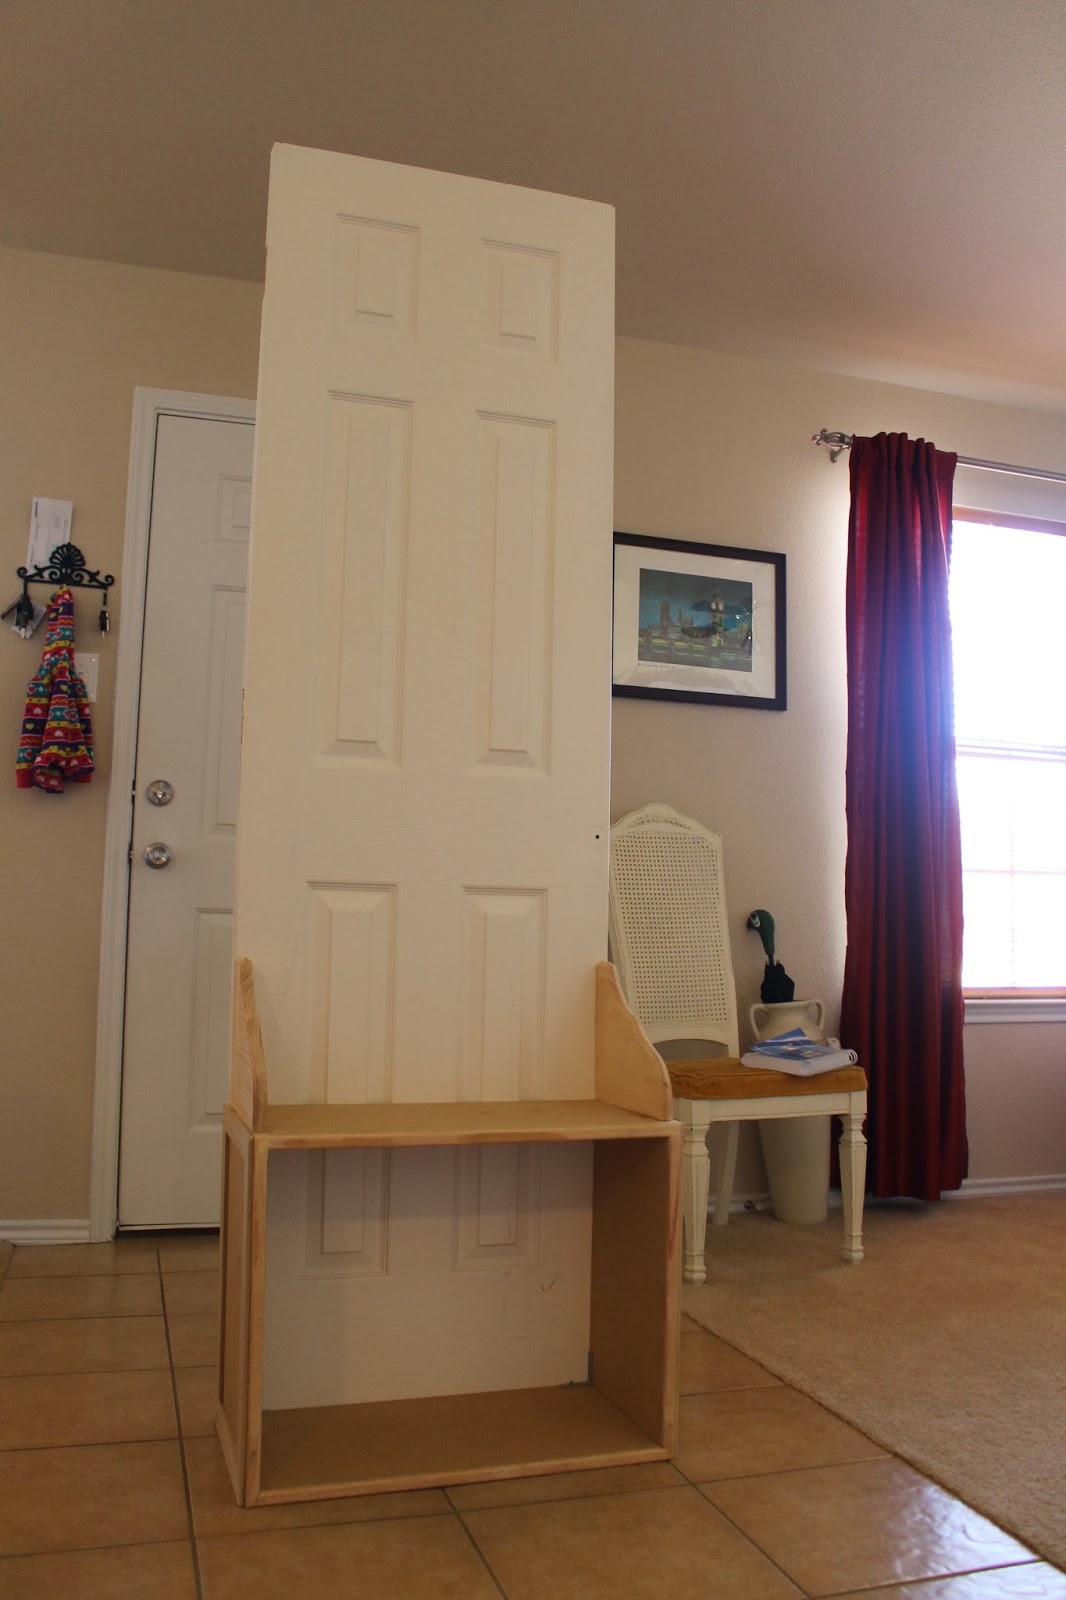
 
 
We bought MDF board (because it was cheap.  Normally we would have used a better wood) and cut it to create a box that would be attached to the door.
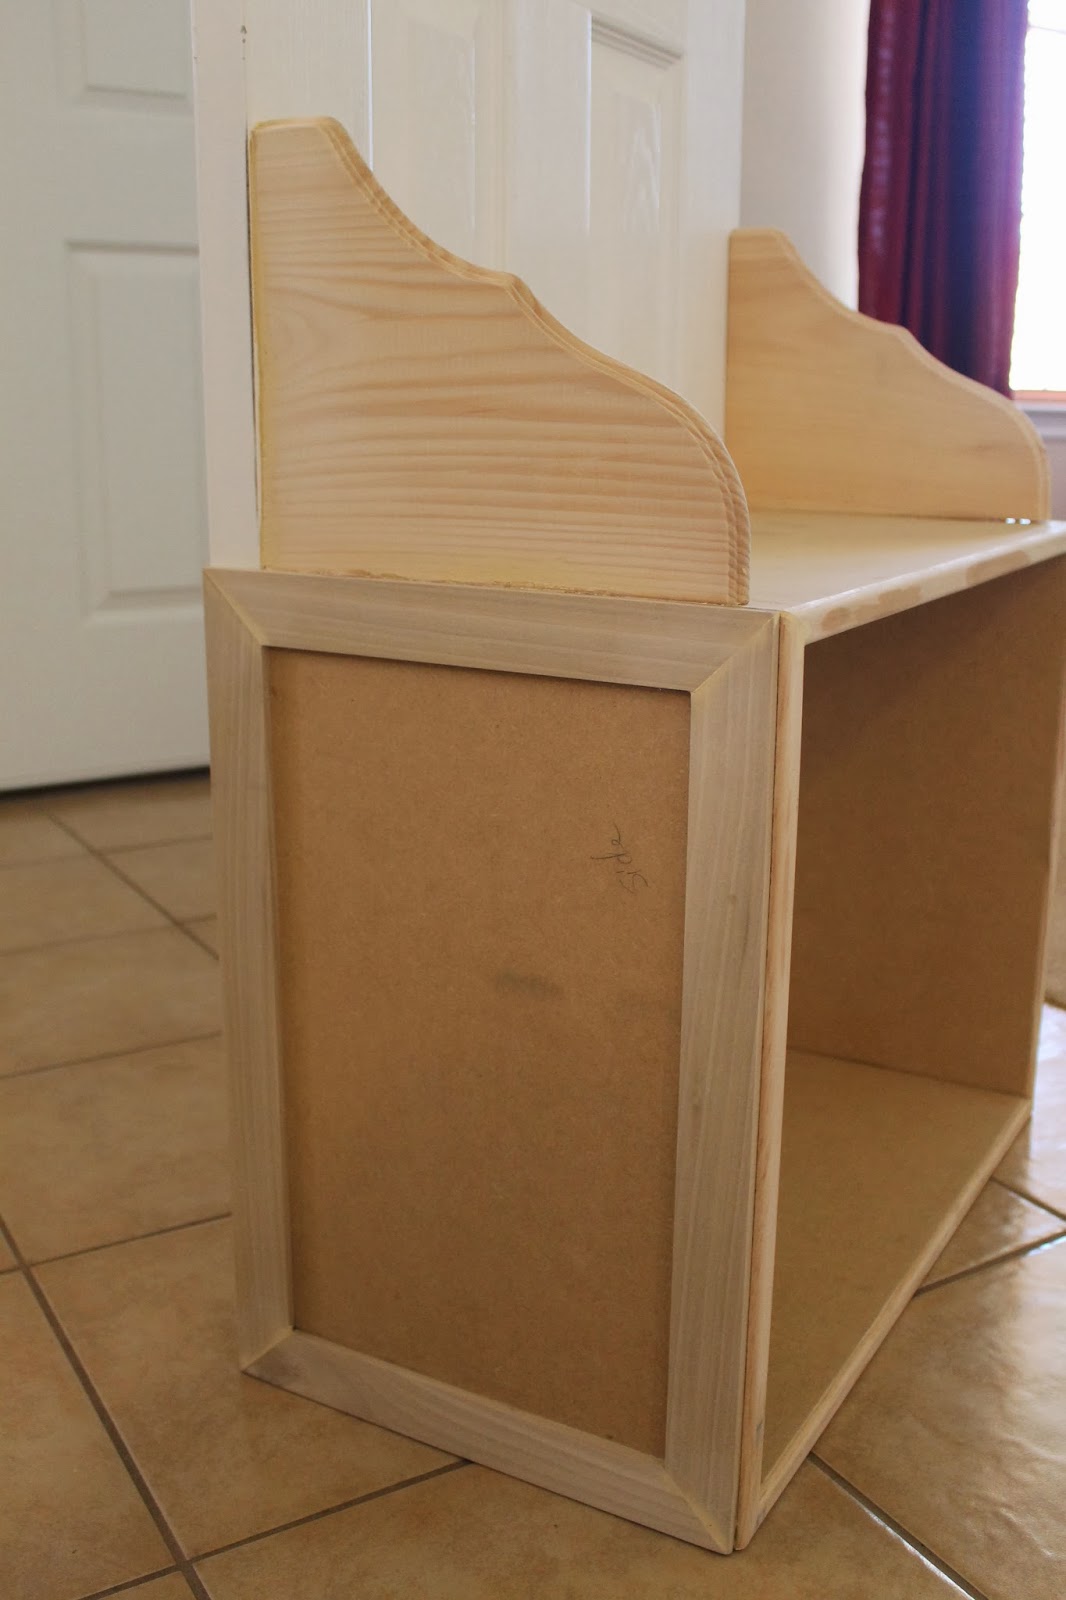


I didn't want my bags falling onto the floor, so we bought wood shelf brackets and attached them to each side.  We wanted the hall tree to have a simple look and feel to it, so we added trim to the front and sides of the MDF box to give it a nice touch. 
 
 
We used Valspar Signature paint in creme fraiche in a satin finish.  This is the perfect white.  Not too bright, but no hint of yellow.  The satin finish is sleek.  Just glossy enough to wipe normal wear and tear marks off, but not enough where it has a glean to it.
  
 
 You can see the trim detail here after it was painted and it gives it just the right look to keep in with my rustic décor. 
 
 
The legs we repurposed from Justin's old night stands.  We have converted the night stands to another project (that I haven't had a chance to write about) and we had 4 left. I think lifting the hall tree up off the floor makes it look so classy.
 
 
 I found the coat hooks and the door knob from Hobby Lobby.  We had already been using the key holder and decided to keep it. It was just screwed into the wall, so I think it will like it's new home. 
  
 
 The door knob is not actually a real knob, more like a décor piece that we placed to look like an old knob. It had a wall hanger on the back but we were able to use screws on each side to hold the knob in place.
 
 
 I really love how it turned out.  It was such a simple project and we were able to finish it up in just 2 afternoons (even with a 1 year old running around!)  They only thing I would have changed was maybe to add some kind of ring or something on the side to store umbrellas.  But that would be easy to add in later.  I might also add a shelf to the top, but I think it looks great without it.
 

 Total Price for the Project: $42
Door: $10 from Restore
MDF Board: $8
Wooden Brackets: $6
Trim: $3
Legs: Repurposed from nightstands
Paint: Left over from another project
Coat Hooks: $9
Key Holder: What we were currently using
Door Knob: $6


Now we have a place to put all of our things.  It's been so nice to have everything together in one place to grab to head out the door or to empty our arms when we get home.

Wednesday, August 14, 2013

Finally Finished This Chair

Remember this chair that I found at a garage sale 2 YEARS AGO?  Remember how I was going to recover it in that yellow fabric, and stain the wood a dark walnut color?  I got started on it and it never got finished.  I recovered the cushions (and learned a lot from doing it for the first time) and tried to stain the wood, but it turned out looking awful.  It ended up being thrown into the garage and the cushions on the floor of the guest bedroom.  Until last week...


When I finished that baby!  I had some white paint left over from another project and decided that white would look so much better against the yellow and really make it pop. 


We bought white blinds while I was on maternatiy leave and I swiched our green curtains out with light blue ones just after we bought our new brown couch to try to brighten up the room a bit.   I think the white, yellow and blue look really pretty together and really bring in some pops of color. 


I really like how this area of the living room is looking so I'm hoping to paint some of our dumpster dive/garage sale furniture that I've brought into the house over the past year and really tie the room together.   With Lillie getting bigger and happy hanging out with her toys in her play pen, I'm hoping to getting back to more of these projects!

Tuesday, December 25, 2012

Farmhouse Table Reveal

Did you forget that Justin built me a dining room table last year for Christmas? 
  
I never shared a sneak peek of the table, but I did show you these awesome cane back chairs I found on Craigs List. 
  
  
A lot of our home projects came to a halt when I got pregnant.  I just didn't have the motivation or energy to do much of anything.  But as soon as we got Lillie home, I've been back to my old self, hard at work on our home projects when I have a little spare time.
 
I busted my butt on this, but I finally got our dining room table and chairs finished!  Since both sides of our family are coming to our house this year to make it easier for us, I wanted it to be finished and looking nice for Christmas. 


I LOVE the way it turned out!
 
 
Doesn't our dining room and formal living look so elegant?  It looks like a real grown up house! Ha.
 
 
Those chairs were a beating to paint.  I didn't know it when I bought them, but painting cane is HARD.  But it was worth it.  Just look at those beauties.  I covered the green seats with burlap and really love how it looks against the Annie Sloan Chalk Paint in Old White.
 
 
Earlier tonight, we had our first of our family Christmases and it was so nice to be able to sit around the table together.  The table is roomy enough for everyone to have room to eat, but still have all the food in the middle of the table.


Don't you think Justin did a fantastic job?!  It is so beautiful and I love it so much!  It will be a family gathering place for years to come and we just might fill up all those chairs with little ones before we know it!  Ok, ok, maybe not all of them, but hopefully half ;)
 
 
From all of us here at the Harmon House-Justin, Jordan, Lillie, Molly and Dexter-we wish y'all a Merry Christmas!  We hope tomorrow is filled with lots of love, happiness, friends and family!
 
Linking up:
  

Skip To My Lou


Friday, December 21, 2012

Special Gift from Mama

 I don't have much time for myself these days, but I have managed to do a few Christmas projects since Lillie has  come home.  It feels nice to craft again.  When I was pregnant, I was too tired or had too much going on.  This past year has been super, super busy for us!


These aren't the best ornaments, but I threw this together for the dogs this year.  We found house chipboard at Hobby Lobby.  The house had a chimney, but Justin cut it off turning it into a perfect shape for a dog house! 
 
 
For Lillie, I made this bird security blanket.  While I was still pregnant, I looked for months in stores and online to buy one for her.  When I couldn't find one, I decided to make one.  Little did I know that I would be able to give my girl this special gift for her first Christmas!


The bird toy was a stroller toy that had rings and other doo dads hanging from it's wings.  I just cut them off, cut a slit in the middle of the blanket, sewed the bird in and added the ribbon.  I love the way it turned out and I hope she loves it too! 


Sunday, September 30, 2012

Our New Coffee Table

I've been wanting a new coffee table since we moved into our house, but it was one of those very low priorities on our list.  What we had wasn't bad, I just wanted something that was a little more our style. 

https://blogger.googleusercontent.com/img/b/R29vZ2xl/AVvXsEh0ohOd68VTdbRk5wxhBVKWDA7-889TFUMJpa1otAJaXaeVlRBvpRQmWSqZngs4V1lZImi334l5CesEcve17Iqh-qKTGI3mf1S3YLlxkA4xXkftSsVPXwAvvkHOz_CHV0MPQmeW1ggmCRlK/s1600/DSC01460.JPG

I knew I wanted more of a farm house style look and I instantly fell in love with this table from Shanty 2 Chic.


Isn't it gorgeous!  It makes my heart swoon.  I showed it to Justin and he said it would be no problem to make our own version of it. 


He drew up his own plans...can you believe that he came up with this?  It's so beautiful!


He used a dark walnut stain on the top and Annie Sloan's Chalk Paint on the legs in
antique white.

 
He also made the top slightly different by framing the entire table on top instead of only the sides.


I love it!  And it really pulls everthing thing in the livingroom together.


Tuesday, July 17, 2012

Texas Rangers Faux TOMS

Over the last few months, I've been too busy or exhausted to craft, create, paint, bake or even really cook for that matter.  But I did find some time to make my mama a gift she would love for Mother's Day.


I used freezer paper as a stencil so that I could get that Rangers' "T" just right.  Have you ever used freezer paper before?  It's super easy.  You just cut out your stencil and iron it on to your fabric causing the plastic side to stick allowing you to paint without worrying about your stencil moving.  When the paint is dry, the freezer paper peels right off.  Here's a tutorial from Make Myself at Home that was really handy.


I free handed the baseball, so it's not as perfect as I wanted it to be, but it think it turned out alright for my first shot! 


Mama wore these to the Rangers game that we went to as a big ole family and she loved them!  She said that they were really comfortable too!  I was thinking of making a Mean Green pair for myself just in time for football season!

Thursday, February 2, 2012

Valentine Wreath

I made this easy Valentine Day heart wreath for our front door and boy, do I love it!

I kept the colors pretty neutral so I can use it year round if I want.

Sunday, January 29, 2012

Dresser Turned Buffet Reveal


Remember the free dresser that I found almost a year ago? 

The one that I was going to convert into a buffet for our dining room?

Well, I finally finished it!  Read on for the full reveal!

Tuesday, January 17, 2012

A Love Inspired Mantel

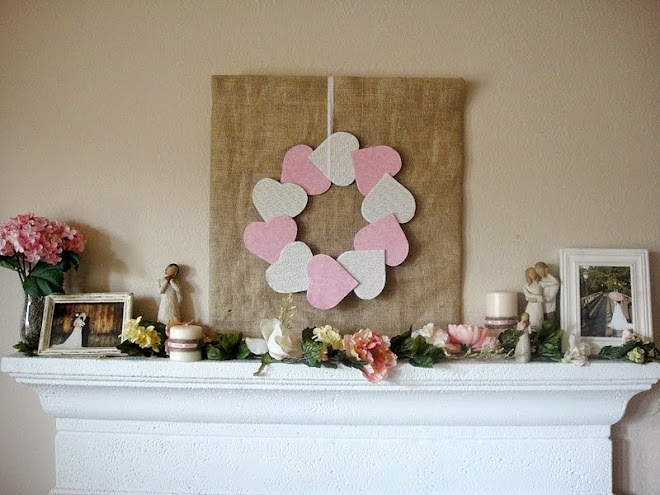
Valentine's Day is just around the corner and this year, I've decided to do a little decorating to celebrate!  I'm not going all out like I do for Christmas, but I thought having a Valentine's Day themed mantel would be nice and I'm going to decorate our dining room shelf too (pics of that to come when I'm finished.) 

Wednesday, January 11, 2012

Photo Ribbon

I've been making these photo ribbons as gifts and everyone has been loving them so I thought I'd share them with you today. 


Pinned Image
via pinterest

I found the idea on Pinterest but made it a little easier on myself by using coasters as the photo tiles rather than canvas.  

The first one that I made was in black in white and I love it.  But the colored photo tiles look really great too!


With each new one I make, I think of something more or different to add to it to make each ribbon unique. 

I can't wait to make my own!

Monday, January 9, 2012

Revamped Stool: A Special Gift


I found this stool in my parent's shop when we were going through all their old junk one day.  It was my Pa Pa's and it had been sitting out there for years just getting dirty and falling apart.  I asked my Mama if I could have it and she told me no.  Then I asked her if I could take it and refinish it for her.  After thinking on it for a while, she reluctantly gave it to me.  I know she didn't want to give it away.  I could feel it. She made up some lame excuse of how she didn't have room for it in her house even if I brought it back to life so I should just keep it.   After I brought it home with me, I started scheming.  What if I refinished it such a way that if I gave it back to her, she wouldn't want to part with it again? 


Related Posts Plugin for WordPress, Blogger...