Showing posts with label painting. Show all posts

Tuesday, December 25, 2012

Farmhouse Table Reveal

Did you forget that Justin built me a dining room table last year for Christmas? 
  
I never shared a sneak peek of the table, but I did show you these awesome cane back chairs I found on Craigs List. 
  
  
A lot of our home projects came to a halt when I got pregnant.  I just didn't have the motivation or energy to do much of anything.  But as soon as we got Lillie home, I've been back to my old self, hard at work on our home projects when I have a little spare time.
 
I busted my butt on this, but I finally got our dining room table and chairs finished!  Since both sides of our family are coming to our house this year to make it easier for us, I wanted it to be finished and looking nice for Christmas. 


I LOVE the way it turned out!
 
 
Doesn't our dining room and formal living look so elegant?  It looks like a real grown up house! Ha.
 
 
Those chairs were a beating to paint.  I didn't know it when I bought them, but painting cane is HARD.  But it was worth it.  Just look at those beauties.  I covered the green seats with burlap and really love how it looks against the Annie Sloan Chalk Paint in Old White.
 
 
Earlier tonight, we had our first of our family Christmases and it was so nice to be able to sit around the table together.  The table is roomy enough for everyone to have room to eat, but still have all the food in the middle of the table.


Don't you think Justin did a fantastic job?!  It is so beautiful and I love it so much!  It will be a family gathering place for years to come and we just might fill up all those chairs with little ones before we know it!  Ok, ok, maybe not all of them, but hopefully half ;)
 
 
From all of us here at the Harmon House-Justin, Jordan, Lillie, Molly and Dexter-we wish y'all a Merry Christmas!  We hope tomorrow is filled with lots of love, happiness, friends and family!
 
Linking up:
  

Skip To My Lou


Sunday, September 30, 2012

Our New Coffee Table

I've been wanting a new coffee table since we moved into our house, but it was one of those very low priorities on our list.  What we had wasn't bad, I just wanted something that was a little more our style. 

https://blogger.googleusercontent.com/img/b/R29vZ2xl/AVvXsEh0ohOd68VTdbRk5wxhBVKWDA7-889TFUMJpa1otAJaXaeVlRBvpRQmWSqZngs4V1lZImi334l5CesEcve17Iqh-qKTGI3mf1S3YLlxkA4xXkftSsVPXwAvvkHOz_CHV0MPQmeW1ggmCRlK/s1600/DSC01460.JPG

I knew I wanted more of a farm house style look and I instantly fell in love with this table from Shanty 2 Chic.


Isn't it gorgeous!  It makes my heart swoon.  I showed it to Justin and he said it would be no problem to make our own version of it. 


He drew up his own plans...can you believe that he came up with this?  It's so beautiful!


He used a dark walnut stain on the top and Annie Sloan's Chalk Paint on the legs in
antique white.

 
He also made the top slightly different by framing the entire table on top instead of only the sides.


I love it!  And it really pulls everthing thing in the livingroom together.


Sunday, January 29, 2012

Dresser Turned Buffet Reveal


Remember the free dresser that I found almost a year ago? 

The one that I was going to convert into a buffet for our dining room?

Well, I finally finished it!  Read on for the full reveal!

Friday, October 21, 2011

Witch Broom Door Hanger

 Halloween is next week so I've been busy getting the house spookified for our party!


Here's a little somthing I made for our front door to welcome all the ghouls and witches that will be coming to visit next Saturday. 

Wednesday, October 19, 2011

DIY Wall Plaque

I love vinyl wall art, but I don't like the price.

$35 Etsy
 Source: etsy.com via Jordan on Pinterest

There are lots of DIY tutorials, but I don't own and can't afford a Silhouette machine.


So I decided to make my own vinyl wall art and I L-O-V-E (no pun intended, ha)  the way it turned out!


Wanna make your own? It's so easy!


I painted the sides of the wooden plaque turning the ugly gold to dark brown.


Then I applied a thin layer of Mod Podge to the top of the plaque.  I wanted to cover up "Welcome to our Ranch."  Not so big on western decor...


So I covered the front of the plaque with the pretty scrapbook paper.


Because my paper was too short to cover the entire face at one time, I had to improvise.  I covered the front as much as I could, let it dry and then covered the other half.  The tricky part was lining up the design so that it would flow nicely and the pattern wasn't too terribly off.


Then I got my brown paint back out and roughly swiped it around the edges to give it a distressed rustic look. 


After the paint was dry, I put the Dollar Tree vinyl wall art on top and Mod Podged the entire think to make sure it was all sealed up and protected. 

Isn't it lovely?


  Do you love my birds?  ::Swoon::  I've loved birds for a long time (maybe cause my nickname is j-bird...ah, old softball days) so I've been trying to incorporate them in the house as much as Justin will let me.  He hasn't said no yet! ;)


 So what do you think?  It cost me less than $5 to make this because I found everything on sale or clearanceI've got a few more of these babies that I'm going to make for different parts of the house.  When I have a chance to get them finished, I'll show y'all how they turned out!


Monday, October 10, 2011

Fall Mantel

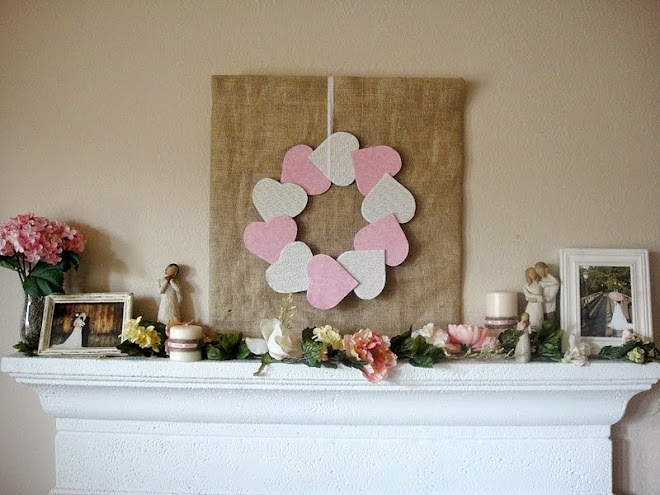
The mantel has been done since the beginning of September, but I'm just finding the time to sit down and share it with y'all.  Just in time to change it in the next few weeks for Halloween!


Justin surprised me with flowers the other day and they went up on the mantel for us to enjoy!


Remember when I said I wanted another Willow Tree figurine for our anniversary?  Well, I got it!  Isn't it so pretty?


This is a pumpkin candle.  It was in our attic.  Candles don't do so well in attics over the summer in 100 + temperatures.


I wanted to have a main focal point for the mantel, but didn't have any money to really make something spectacular.  So I used what I already had and made this!  I covered up our poppy canvas with some craft paper that was used as stuffing in a box for an item that was shipped to us, drew a pumpkin and then painted it with some craft paint that I already had.  I'm not artistic, so I was very pleased at how it looked!


I love decorating for fall.  All the warm colors make the house so cozy!

Monday, August 29, 2011

All in the Family

Remember my sister, Em?  I made the scrapbook paper wall plaques for her new apartment as a little house warming present.  Well, it turns out that she has a creative side too!  And she's even better than me!  Where I mostly use other's ideas for my inspiration, she's actually used her noggin to completely design and create her own diy home decor.  This is perfect for college students who are trying to decorate their dorm rooms or those moving into their first apartment and don't have a big budget for decorating.  I'm so excited to be able to feature her project!

Here's what she made!  Isn't it cute!  She used the  tops off of old shoe boxes to make this super cool, modern wall display.  Canvas is pricey, and if you are anything like my sister and love shoes, you have TONS of shoe boxes in your closet  just waiting for you to create something beautiful.


 She took her box tops and painted them these pretty, bright colors to match her bedroom.


 She found a spool of thread to use as a template to draw her circles.


Then she traced her lines.


And then she finger painted her design!  She is so smart :) I bet this entire project cost her less than $3 because all she had to buy was the paint.  Am I right, Em?


And now she has something totally fabulous to hang above her bed!

Good job Em!  I can't wait to see what you make next!

Related Posts Plugin for WordPress, Blogger...